Our experts are always on hand to help answer your questions, get you started, and grow your presence online. You can email us any time
How to create an onion service from the portal
- Knowledgebase
How to create an onion service from the portal
One page creates a service: an onion address, a hosting plan and the software stack it starts with. Everything is billed monthly from your account credit, and the address is generated for you unless you ask for a prefix.
Step 1 — Open the Create page
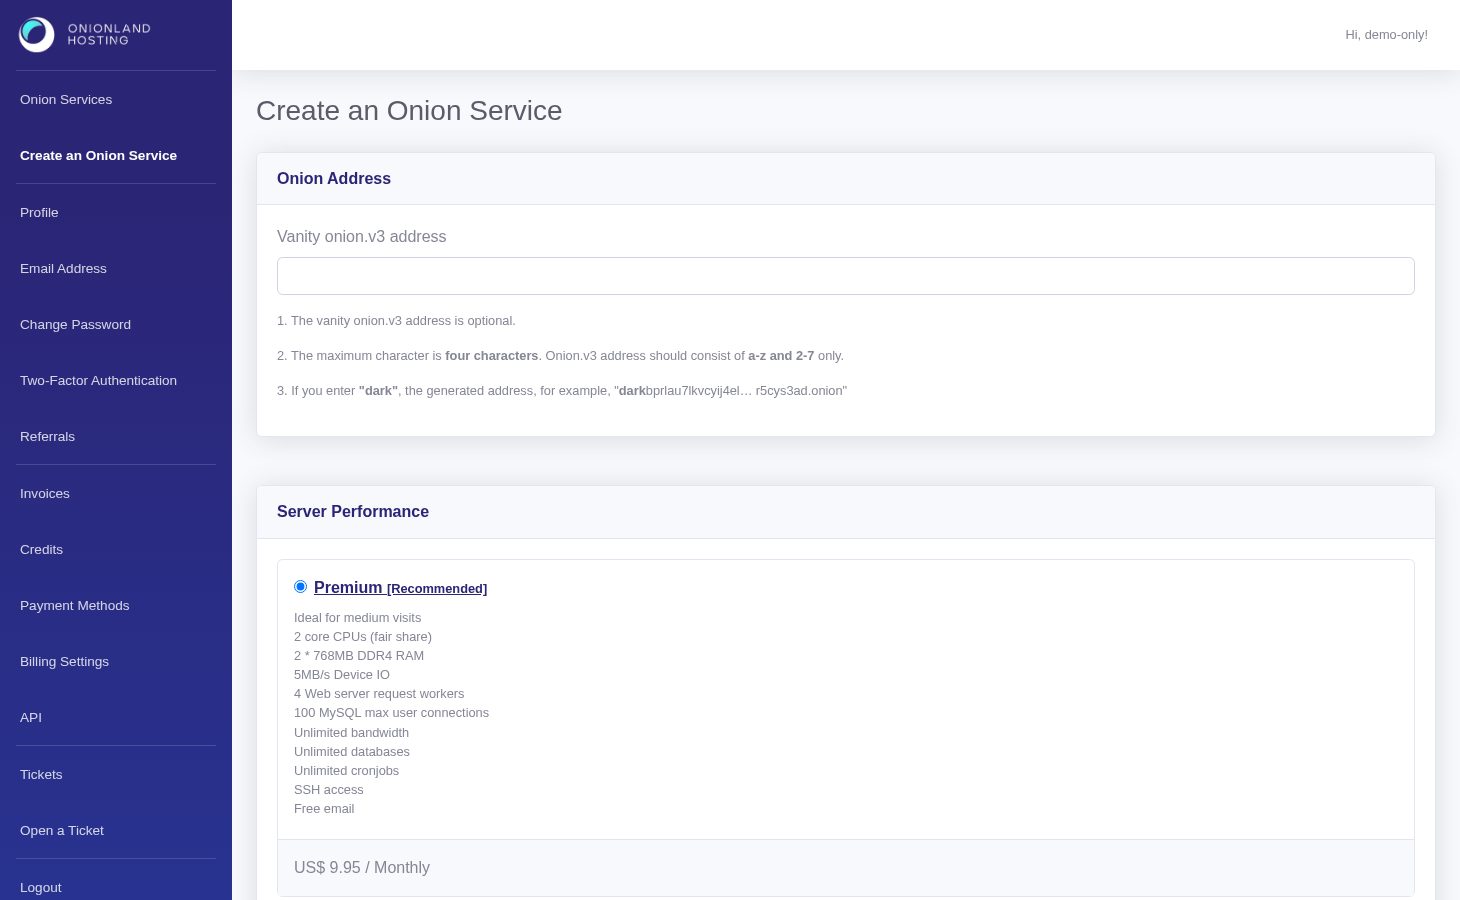
In the Customer Portal, click "Create Onion Service" in the sidebar. The page has three cards — the vanity prefix, the server performance, and the hosting software — plus the button that submits all of it.
Step 2 — Optional: a vanity prefix
The prefix is the beginning of the address. Leave it empty and you get a random one immediately; type up to four characters (a-z and 2-7) and the address will start with them, but the host has to search for a matching key, so a longer prefix takes much longer to appear. The rest of the address is always random.
Step 3 — Choose the plan
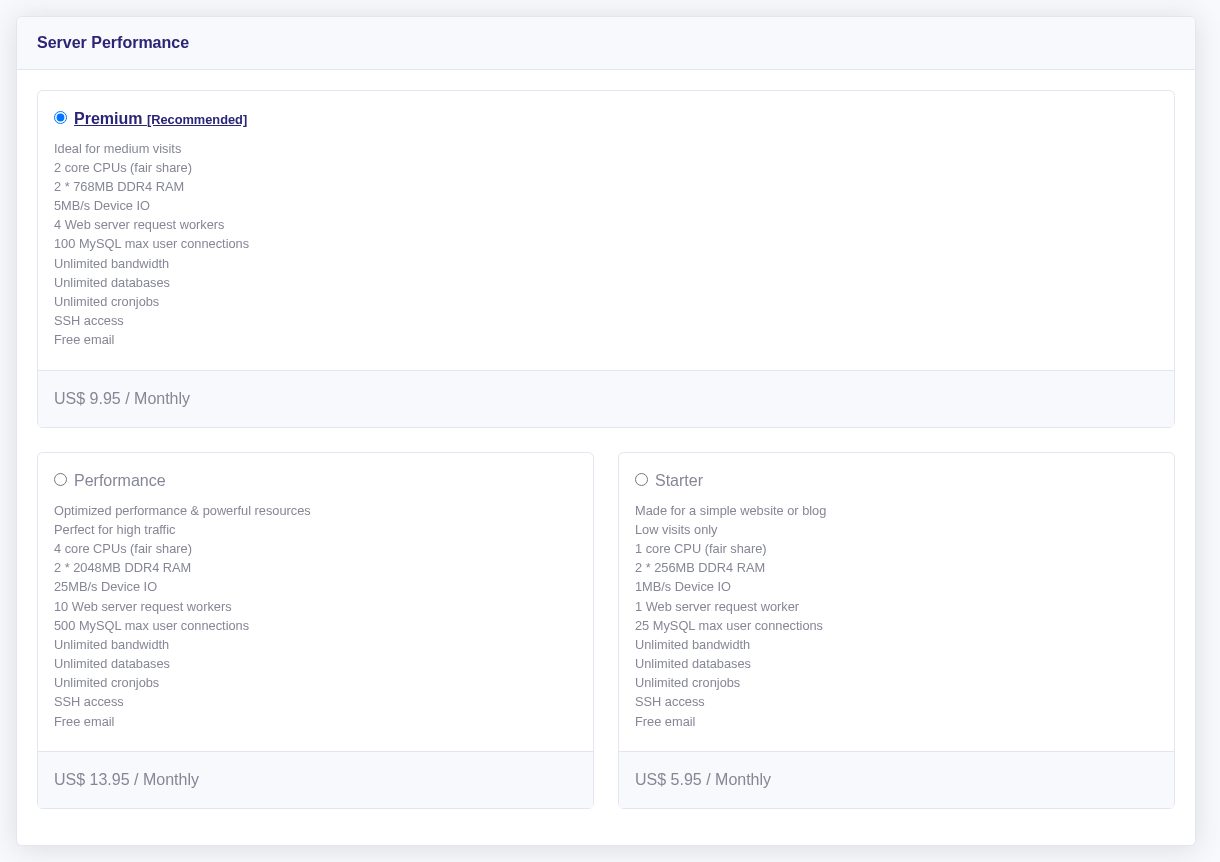
Server Performance lists the three plans with what each one gets: CPU share, RAM, device I/O, web server request workers and the MySQL connection limit. Starter is enough for a small site, Premium doubles the resources, Performance is for high traffic. The monthly price is printed on each card and is charged from your credit.
Step 4 — Choose the software
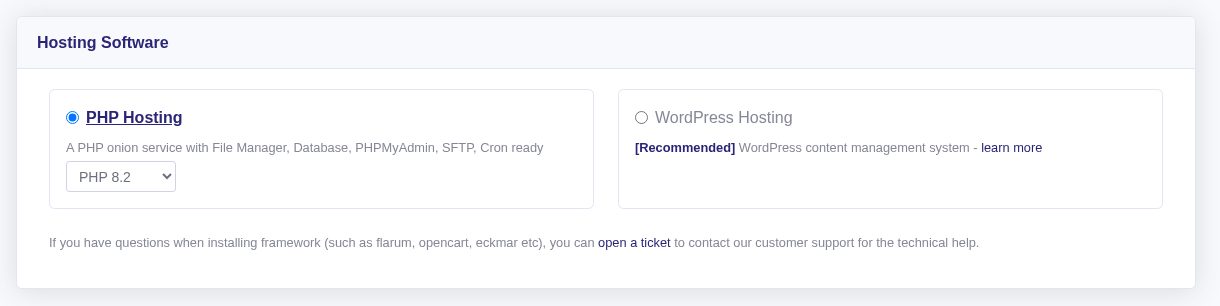
Hosting Software decides what is installed before your first visit: a plain PHP site with an optional framework (Laravel, Symfony, CakePHP, CodeIgniter, Yii, Drogon), or WordPress, together with the PHP version to run — 7.4, 8.2 or 8.3. You can change the PHP version later from the PHP Version tab, so pick what your code needs today.
Step 5 — Create it
Press Create New Onion Service. The portal returns to the service list with a green message: "Your onion service is deploying. You may try to refresh the page to see the latest status." The new row shows a red indicator and the address is already reserved.
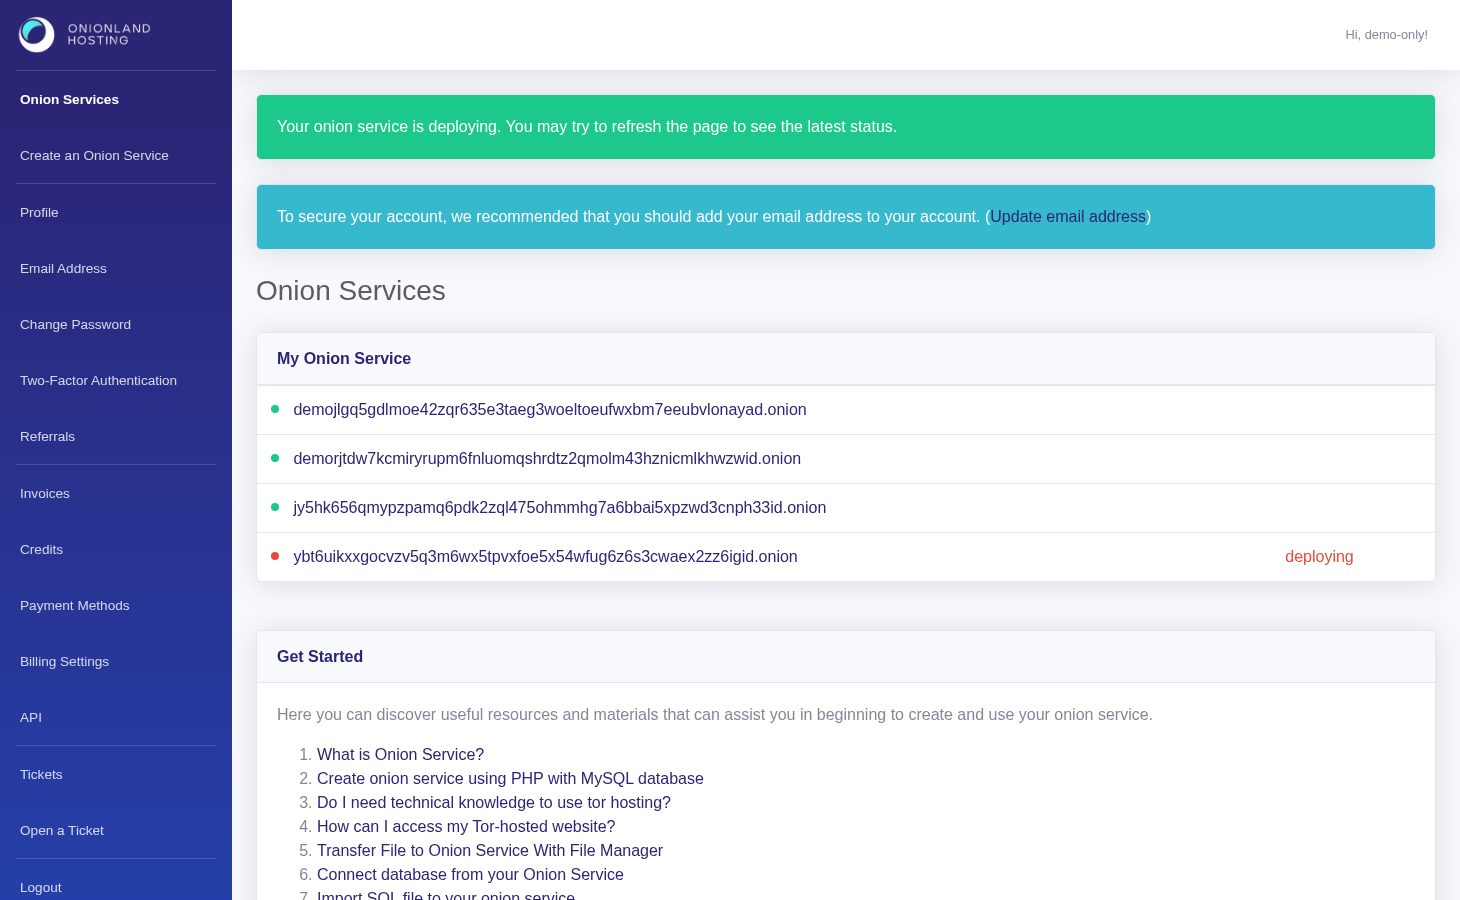
Deployment takes a minute or two. Refresh the page: the indicator turns green and the row becomes a link to the service.
Step 6 — First look at the dashboard
Open the service. The header shows the address, the stack, the PHP and MySQL versions and the plan; the resource cards and graphs fill in once the host has collected the first samples, so a brand-new service legitimately shows "Data is not available" for a few minutes.
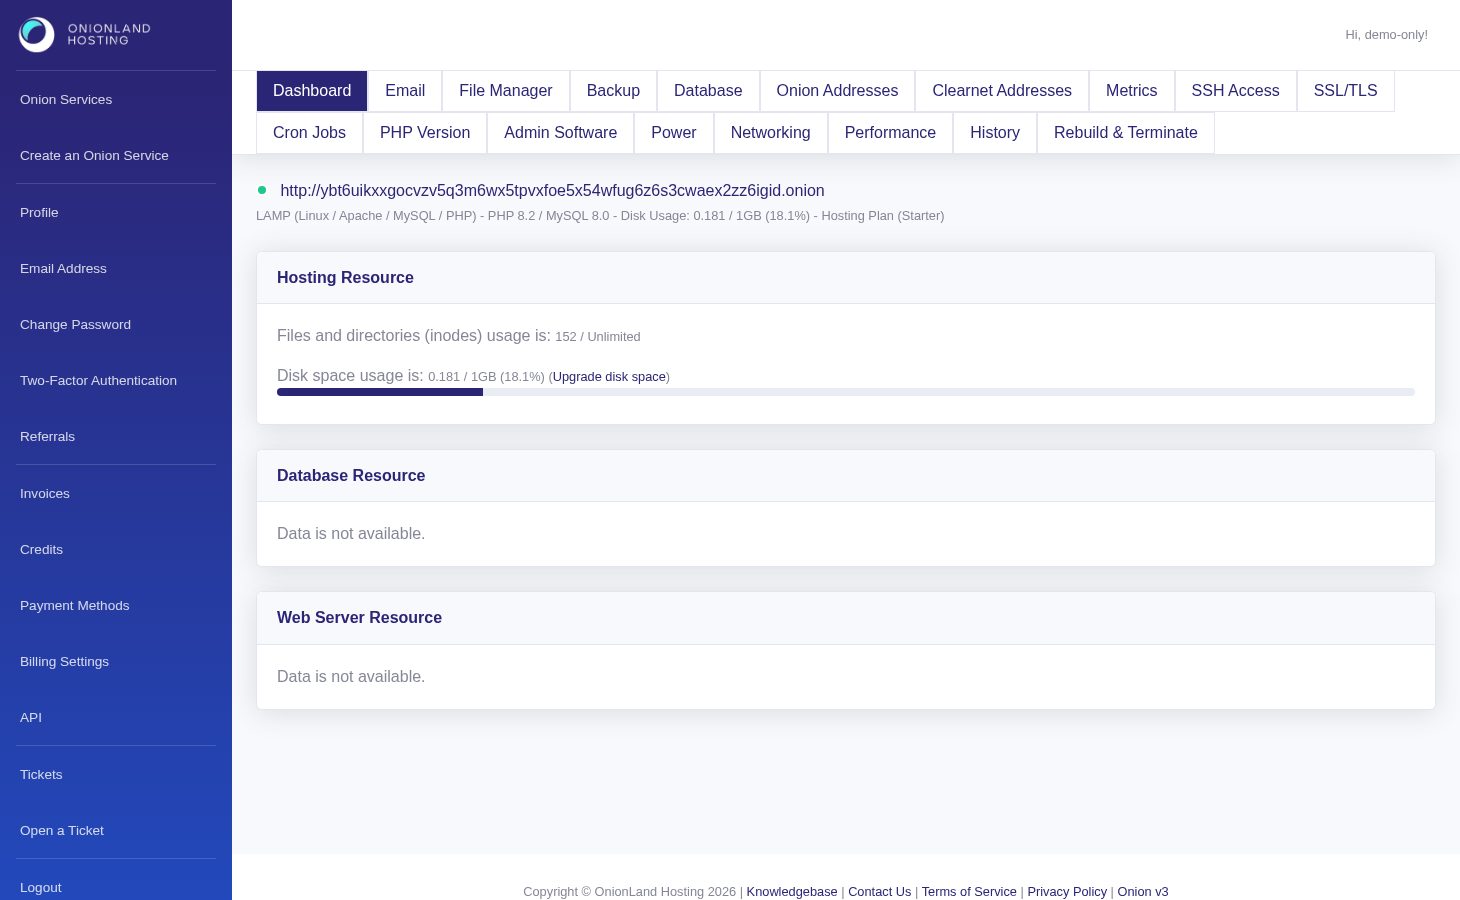
From here the usual next steps are: upload your files over SFTP or the File Manager, import a database on the Database tab, and enable SSL/TLS if you need HTTPS. All of them are described in the other articles of this knowledgebase.
Related articles
Tags:
- Onion Service
- Customer Portal
- Billing